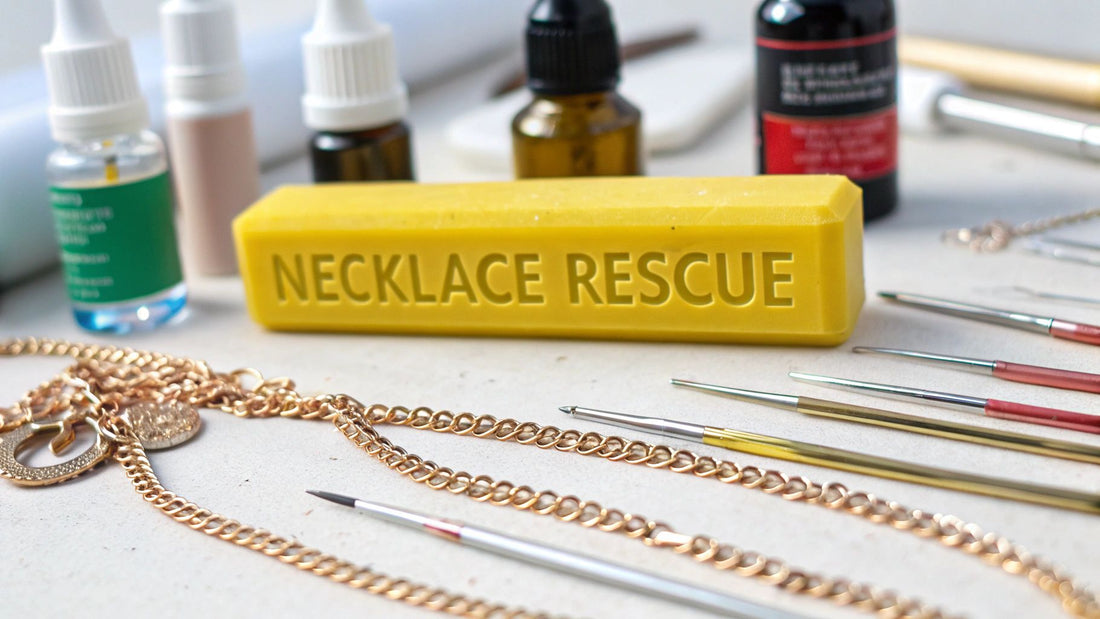
To untangle a chain necklace, you need three key things: patience, a flat surface, and a sharp, pointy tool like a pin or needle. The secret is to gently pick the knot apart from the center, not pull it tighter from the ends. For stubborn tangles, a drop of lubricant like baby oil can work wonders to reduce friction, making the whole process smoother and saving your delicate chains from damage.
Why Do Necklaces Tangle So Easily?
It’s a frustrating moment we all know: you reach for your favorite necklace only to find it in a twisted, knotted mess. Before we jump into the fixes, it helps to understand why this happens. A chain’s tendency to tangle is a frustrating mix of physics, its own design, and how we handle and store our jewelry.
The main culprits are almost always the same:
- Chain Type and Length: Fine, delicate chains like snake or box chains are notorious for knotting up. The longer the chain, the more opportunity it has to loop around itself and create those impossible-looking tangles.
- Improper Storage: Tossing multiple necklaces into a single drawer or pouch is a guaranteed recipe for a jewelry jumble. Without something to keep them separate, movement and friction will inevitably cause them to intertwine.
- Movement and Agitation: Whether it's the vibration from a car ride or just you rummaging through a jewelry box, any kind of shaking causes chains to shift, cross over, and tie themselves into knots.
Setting Yourself Up for Success
Before you even think about touching the knot, preparing your workspace is the most important thing you can do. Rushing the job or working in a poorly lit area will only lead to more frustration and possibly a broken chain.
A classic mistake is trying to untangle a necklace while holding it in your hands. Gravity works against you, constantly tightening the knot as you work and making your job ten times harder. Always, always start by laying the necklace on a flat, hard surface.
Find a spot with good, direct light, like a desk right under a lamp. A plain white piece of paper can create helpful contrast, making it much easier to see the individual links of a gold or silver chain. Gather your tools—a couple of sewing pins or a tack will do—and just take a deep breath. Having everything ready lets you work methodically. This simple prep work turns a maddening task into a manageable puzzle, setting the stage for the specific techniques we'll get into next.
Before diving into the full step-by-step methods, here’s a quick overview of the best approaches for different types of tangles.
Quick Guide to Untangling Methods
This table gives you a bird's-eye view of the most effective ways to tackle a knotted chain, what they're best suited for, and the simple tools you'll need from around the house.
| Method | Best For | Required Tools |
|---|---|---|
| The Pin Method | Small, tight knots on fine chains | Two pins, needles, or a tack |
| The Oil Method | Stubborn, dense knots and multiple chains | Baby oil or olive oil, pins, paper towel |
| The Powder Method | Very fine or delicate chains like snake chains | Baby powder, a small brush, pins |
| The Screwdriver Method | Looser knots on thicker, sturdier chains | Small flat-head screwdriver (like for eyeglasses) |
Think of this as your cheat sheet. Now, let’s get into the nitty-gritty of each technique.
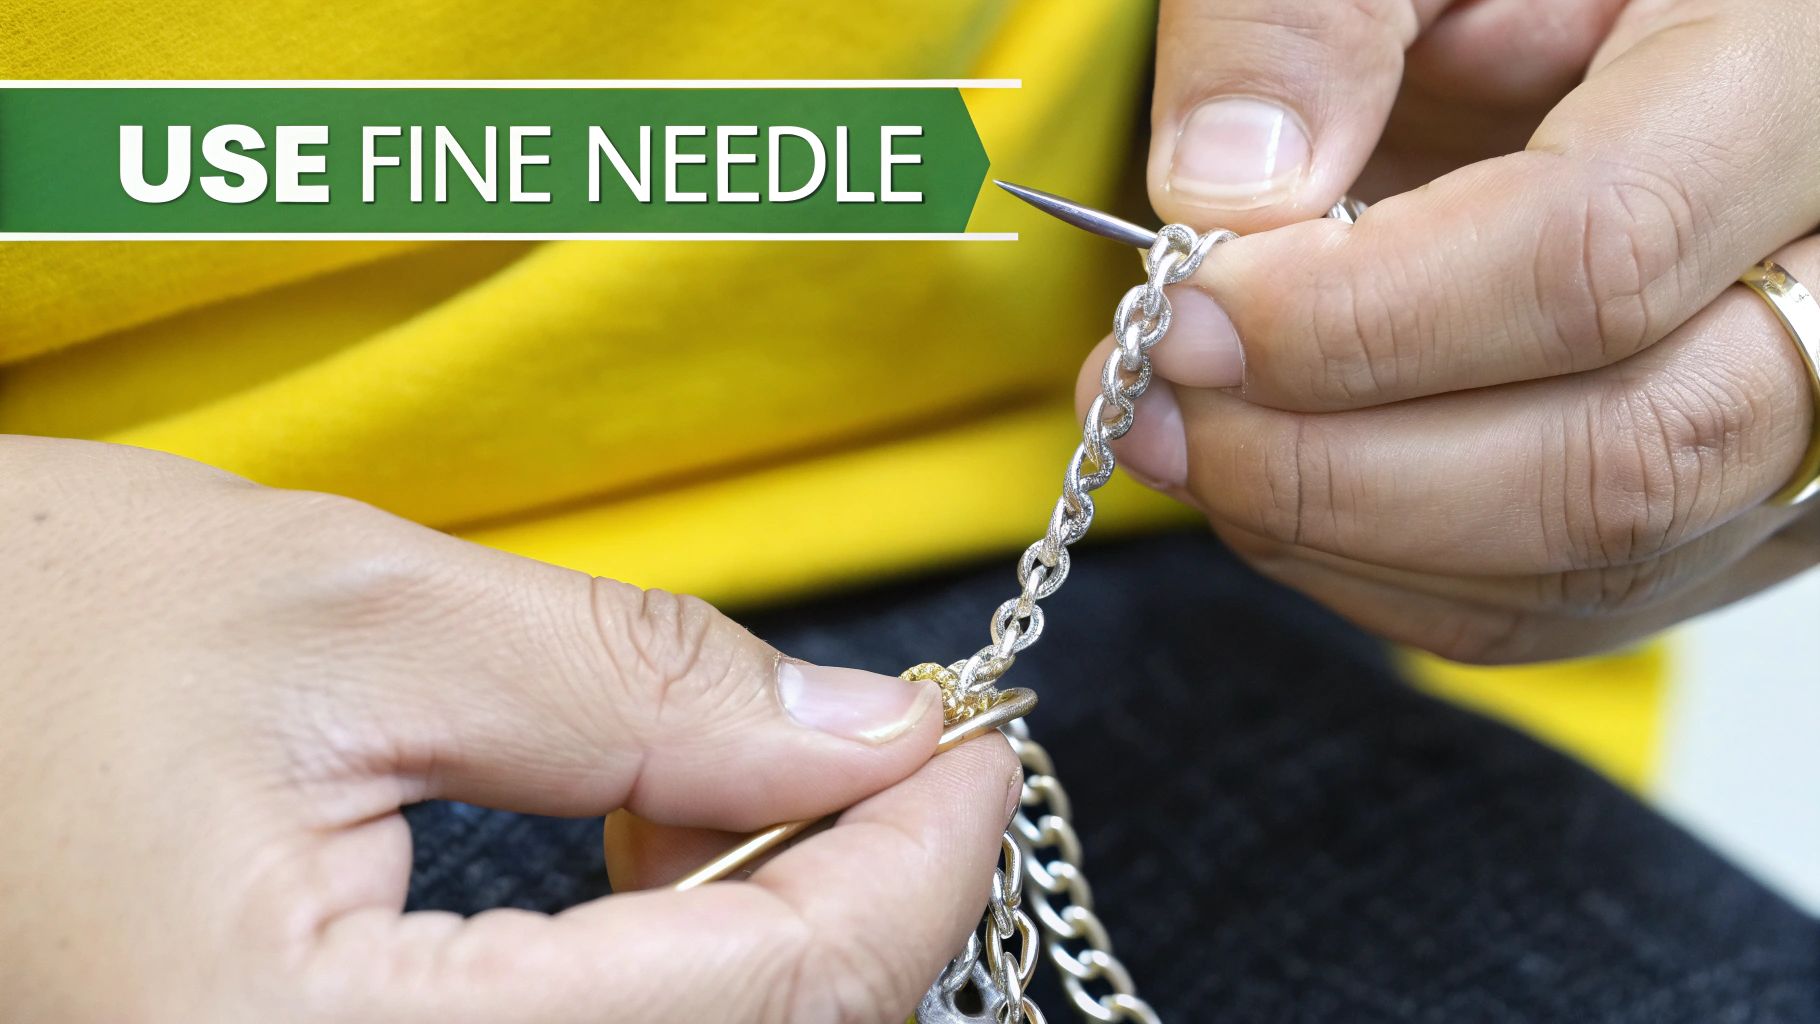
The Precision Method: Using Pins or Needles
When you’re staring at a tiny, stubborn knot in a delicate chain, brute force is your enemy. This is where you need to get surgical. The pin-and-needle method is a favorite among jewelers for a reason: it’s gentle, precise, and incredibly effective. All it takes is a steady hand, good lighting, and a couple of fine-tipped tools to carefully pick the knot apart without causing any damage.
For this, you’ll need two sharp, pointed objects. Sewing needles are perfect, but in a pinch, you can grab safety pins, thumbtacks, or even the tips of a couple of mechanical pencils. The goal is simple: have two points you can control independently to create space inside that tangled mess.
First, Prep Your Workspace
Before you even think about touching the knot, set up your station correctly. Don't try to untangle the necklace while it’s dangling or balled up on a soft surface like a towel—that just makes the knot tighter and harder to see.
Lay the necklace on a hard, flat surface. A kitchen counter or a desk works perfectly.
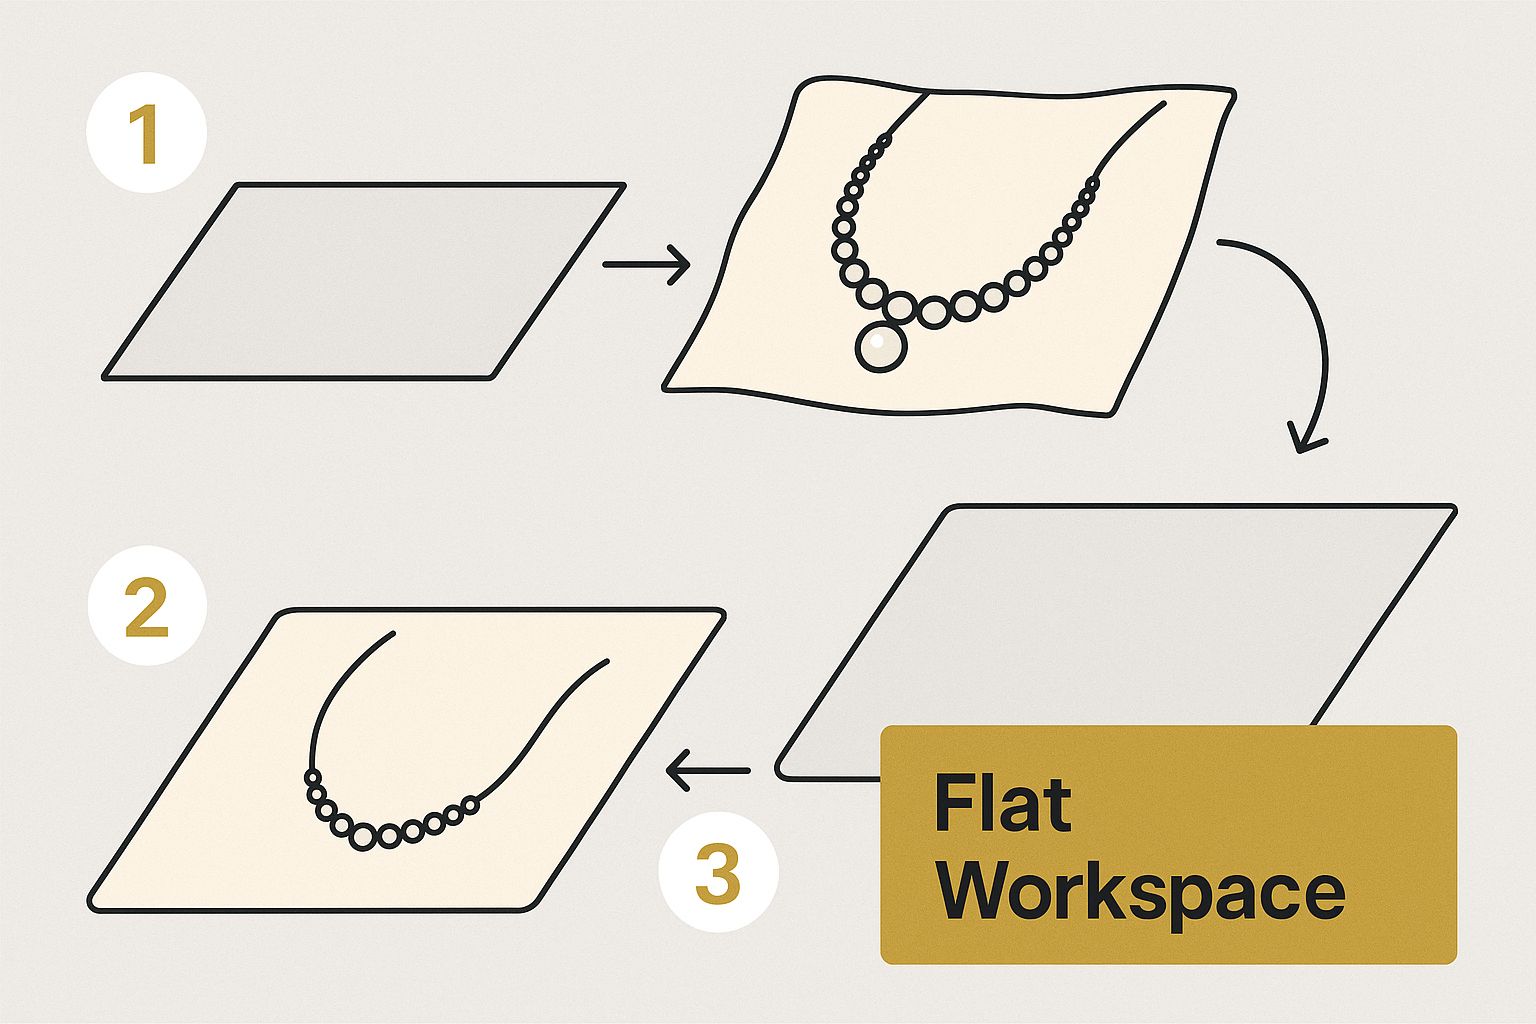
A stable, uncluttered surface gives you the control you need to gently work on the knot without fighting gravity or losing your place. A well-lit area is non-negotiable for success here.
Wiggle the Knot Loose
Once your necklace is laid out flat, unfasten the clasp to give yourself more slack. Gently spread the chain out on either side of the knot to reveal its structure. Your first target is the very center of the tangle.
Take the tip of one of your pins and insert it right into the middle of the knot. You’re not trying to pry it open yet—you’re just creating a tiny bit of space. Now, insert the second pin right next to the first one, also in the heart of the knot.
The secret is a gentle wiggling motion. Once both pins are inside the knot, slowly and carefully pull them away from each other. This motion will start to loosen the tangle, creating more room to work.
Keep repeating this process: insert the pins and gently pull them apart. You’ll start to see the individual chains separate. As soon as you can see a distinct loop, use one of the pin tips to carefully guide that section of the chain out of the tangle.
Common Mistakes to Avoid
Patience is the most crucial tool you have when learning how to untangle chain necklaces this way. Rushing will almost certainly lead to a broken or kinked chain. Trust me on that.
Here are a few pitfalls to watch out for:
- Pulling Too Hard: Being aggressive will only tighten the knot. It’s counterintuitive, but a light touch is what works. Let the pins do the heavy lifting.
- Working in Poor Light: If you can't see the individual links, you can't untangle them. A bright desk lamp or working near a sunny window is your best friend here.
- Giving Up Too Soon: Some of these knots are surprisingly stubborn and can take several minutes to loosen. Stick with the gentle wiggling motion. It will eventually give way.
This technique is so widely recommended by jewelry experts because it gives you maximum control. By placing two needles into opposite sides of the knot and gently teasing them apart, you can loosen even the most compact tangles without putting any real stress on the fragile links.
What About Those Really Stubborn Knots? Try a Lubricant
Sometimes, a pin just won't cut it. You can pick and pull all day, but if that knot is wound super tight, friction is your real enemy. This is where a little bit of lubricant becomes your secret weapon.
By adding something slick to the tangled mess, you’re helping the metal links glide past each other instead of grinding together. It completely changes the game, turning a frustrating wrestling match into a much smoother operation.
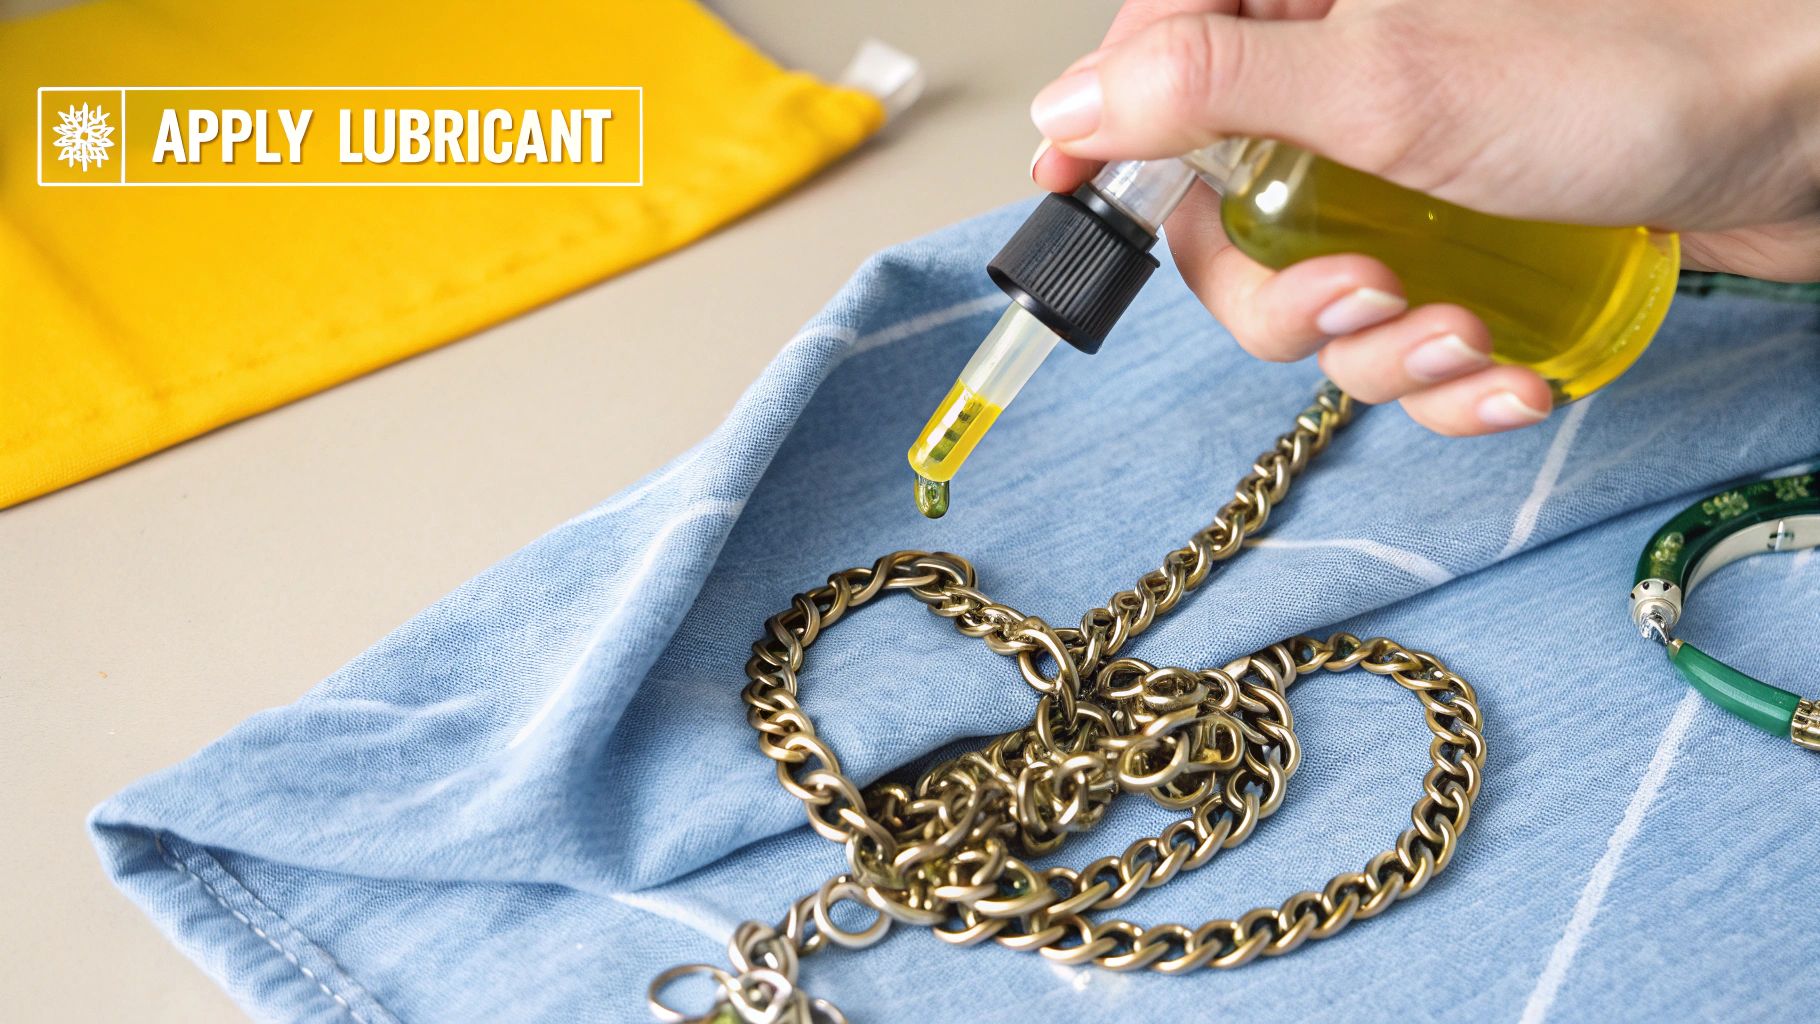
You don't need anything fancy for this trick. In fact, you probably have a few perfect options in your house right now. A tiny drop of baby oil or even olive oil applied with a cotton swab right on the knot can work wonders. The goal is to get it into the tangle, not all over the necklace.
Choosing The Right Lubricant For Your Jewelry
Before you grab the nearest oil, it’s smart to think about what your jewelry is made of. Not all lubricants are a good match for precious metals or delicate gems.
Here are a few safe and surprisingly effective options:
- Baby Oil: Our top choice. It’s gentle, works like a charm, and is easy to clean off when you’re done.
- Olive Oil: A great natural alternative that gives the metal links just the right amount of slip.
- Window Cleaner: It sounds odd, but a quick spritz of Windex or a similar ammonia-based cleaner can cut through grime and reduce friction. Use this one sparingly and stick to solid metal chains only.
A crucial point to remember is to avoid oils and harsh chemicals when dealing with porous gemstones like pearls, opals, or turquoise. These stones can absorb the substance, leading to permanent discoloration or damage. For these pieces, stick to gentler methods.
The Gentle Approach: A Soapy Water Soak
If you're worried about using oils or chemicals, a warm, soapy bath is a universally safe starting point. This is a technique jewelry experts often recommend because it’s gentle and minimizes the risk of damage.
Just let the tangled necklace soak in a bowl of warm water with a few drops of mild dish soap for 5 to 10 minutes. The soapy water acts as a light lubricant, easing the tension between the links. After its bath, lay the necklace on a flat surface and get back to work teasing the knot apart with your pins. You'll be surprised how much more manageable it is with that little bit of extra slip. If you're curious about gentle ingredients, looking into products with natural lip balm ingredients can offer some interesting parallels on what’s safe and effective.
Once your necklace is finally free, it's really important to clean off any residue. A quick wash with mild soap and warm water, followed by a gentle pat dry with a soft cloth, should do the trick.
How to Prevent Necklaces From Tangling
Dealing with a stubborn knot is one thing, but preventing it from forming in the first place is the real secret to stress-free jewelry ownership. Proactive care and smart storage habits are far more effective than any detangling trick. Shifting how you store and travel with your necklaces will save you countless minutes of frustration.
The core issue is almost always movement and friction. When chains are allowed to shift and rub against each other, tangles are pretty much guaranteed. The solution is to create separation and limit that movement.
Smart Storage Solutions at Home
Tossing your beautiful necklaces into a dish or a single drawer is a recipe for disaster. Investing in a proper storage system is the single best thing you can do to keep your collection organized and ready to wear.
- Hanging Organizers: Wall-mounted racks or standing T-bar displays are excellent because they use gravity to their advantage. By letting each necklace hang vertically, you ensure the chains remain straight and separate.
- Compartmentalized Jewelry Boxes: A quality jewelry box with individual, soft-lined compartments is a fantastic investment. It not only stops tangles but also protects your pieces from scratches and dust.
- Individual Pouches: For very delicate pieces, storing them in separate soft fabric pouches offers an extra layer of protection. This is also a great solution if you have limited space.
No matter which method you choose, the golden rule is one necklace per hook or compartment. This simple discipline eliminates nearly all opportunities for tangling.
Travel Hacks to Keep Chains Separate
Traveling is notoriously hard on jewelry. The vibrations and jostling inside a suitcase can create the most frustrating knots imaginable. Fortunately, a few clever hacks can keep your pieces secure on the go.
The drinking straw trick is a classic for a reason. Simply unclasp a necklace, thread the chain through a regular plastic straw, and fasten the clasp. The straw acts as a rigid sleeve, making it almost impossible for the chain to knot up.
For shorter trips or smaller chains, you can also use press-and-seal plastic wrap. Just lay your necklaces out flat on one side, leaving space between them, then press the top layer down to seal each one in its own little pocket.
Tips for Wearing Multiple Necklaces
Tangling doesn’t just happen in a jewelry box; it can also happen while you're wearing multiple pieces. The key to a successful layered look is creating contrast in weight and length.
Mixing a fine, lightweight chain from our collection with a heavier, chunkier one helps them stay in their own lanes. Similarly, ensuring there are at least two inches of difference in length between each necklace minimizes overlap and reduces the chances of them intertwining throughout the day.
If you really want to master this look, our detailed guide on how to layer necklaces offers expert tips to keep your style flawless and knot-free. By choosing pieces that work together instead of against each other, you can enjoy a beautifully layered look without the tangled mess.
When to Stop and See a Professional Jeweler
While most tangles can be conquered with patience and household tools, there are times when your best efforts might do more harm than good. Pushing too hard on a stubborn knot can lead to kinked metal, strained links, or even a snapped chain.
Knowing when to seek professional help is a crucial part of responsible jewelry care. It protects your cherished pieces from permanent damage, especially valuable heirlooms or necklaces with significant sentimental value.
Signs It’s Time to Call a Professional
Recognizing the warning signs can save you a lot of heartache. If you run into any of these situations while trying to untangle your chain necklace, it’s time to step back and find a local jeweler.
- The Knot is Rock-Hard: You've tried lubricants and gentle picking, but the knot feels completely solid. Forcing it at this point will almost certainly cause damage. Professionals have specialized tools that can loosen knots without applying dangerous pressure.
- The Chain is Extremely Fragile: Delicate chains, like fine snake or box chains, are notoriously easy to break. If you’re dealing with an antique piece or an ultra-fine chain, the risk of snapping a link is high. A jeweler’s steady, experienced hand is your safest bet.
- Delicate Gemstones are Involved: If pearls, opals, turquoise, or other porous gemstones are caught in the tangle, using oils or chemicals is a non-starter. A jeweler knows exactly how to work around these delicate elements without causing discoloration or damage.
It’s important to remember that a jeweler has seen it all. What looks like an impossible, hopeless mess to you is often a routine, five-minute job for them. They have the right tools, magnification, and experience to safely resolve the issue.
What to Expect From a Jeweler
Taking your necklace to a professional is straightforward. Find a reputable local jeweler with good reviews. Many offer this service for a small fee, and some may even do it for free if you're a regular customer.
They will likely use a combination of precision tools, safe lubricants, and sometimes an ultrasonic cleaner that uses vibrations to gently loosen the knot. This process is usually quick and ensures your piece is returned in perfect condition.
If your attempts have unfortunately led to a break, don’t panic. A skilled jeweler can often perform seamless repairs. If you're facing this situation, understanding how to fix a broken chain on a necklace can give you a better idea of what the repair process involves. Ultimately, trusting a professional is the best way to ensure your favorite necklace lives to be worn another day.
Common Questions About Untangling Necklaces
Even with all the right tricks, some knots feel like they have a mind of their own. Let's tackle some of the most common questions that pop up when you're faced with a particularly stubborn tangle.
Getting the details right—from the type of chain you're working with to the tools you're using—can make all the difference.
Does the Type of Metal Affect the Untangling Method?
For the most part, no. The tried-and-true methods using pins and lubricants work beautifully on common jewelry metals like gold, sterling silver, and platinum. The real concern comes into play with plated jewelry.
If your necklace is gold-plated or silver-plated, you must be extra careful. Too much rubbing or using sharp tools can easily wear away that thin outer layer, revealing the base metal underneath. For these pieces, think gentle. A soft lubricant like baby oil is your best friend, and try using smooth, rounded tools—like the back of an earring post—instead of a sharp pin to avoid scratching the surface.
Can I Use a Sewing Pin on a Very Fine Chain?
Yes, absolutely. A standard sewing pin is one of the best tools you can use for those whisper-thin, delicate chains. Its fine point is perfect for getting into the tiniest parts of a knot without putting stress on the entire necklace.
The trick is to use an incredibly light touch. Don't try to force the knot apart. Instead, use the pin's tip to gently wiggle and create tiny pockets of space within the tangle. Patience is everything here; slow and steady movements will coax the chain loose without creating kinks or, worse, a break.
The biggest mistake people make with fine chains is pulling on the ends. This just tightens the knot into a tiny, dense ball, making it nearly impossible to fix. Always work from the center of the tangle outward.
What if Multiple Necklaces Are Tangled Together?
Seeing a clump of several necklaces twisted into one giant knot can feel overwhelming, but the strategy is exactly the same—just scaled up.
First, unclasp all the necklaces involved. This immediately gives you more slack to work with. Lay the entire knotted mess on a flat, well-lit surface. Then, focus on freeing one necklace at a time. Pick one chain and patiently trace its path through the tangle, using your fingers or a pin to gently guide it out of the larger knot. Once you've liberated one, set it aside and move on to the next. Adding a bit of lubricant at the start can make this process much smoother by cutting down on the friction between all the different chains.
At Precious Pulse Jewelry, we believe your beautiful accessories should be ready to wear, not stuck in a tangled mess. Our collection features a wide variety of stunning, tarnish-resistant necklaces designed for effortless style that lasts. Find your next favorite piece that is both beautiful and easy to care for. Visit us at https://preciouspulsejewelry.com to discover jewelry you'll love.