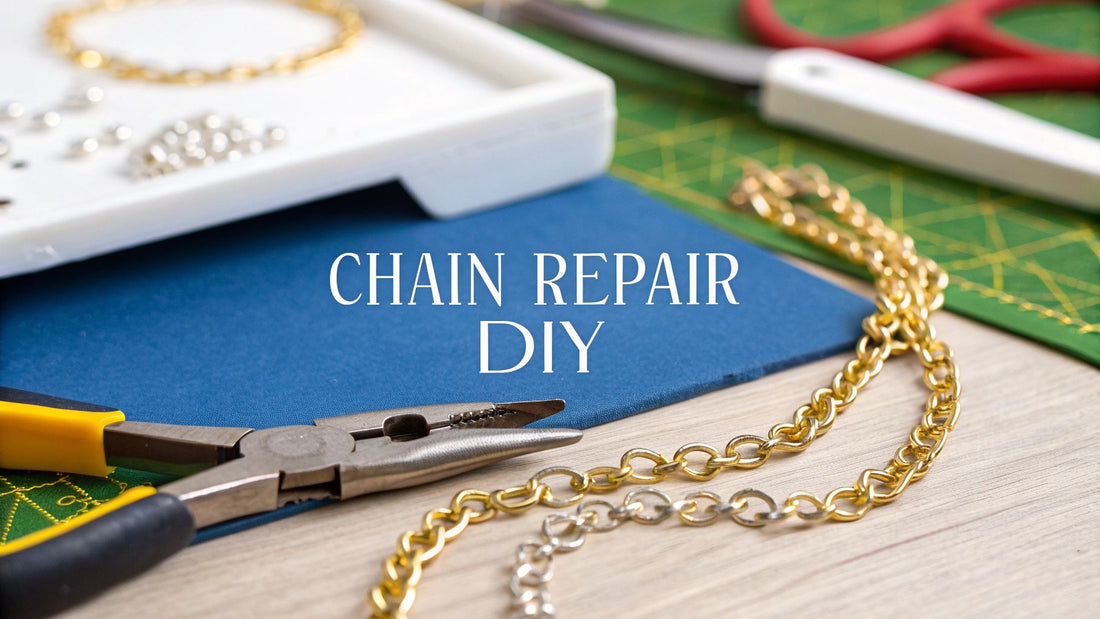
That gut-wrenching moment when you hear a faint snap and your favorite necklace falls from your neck is something we've all felt. But before you banish it to a tangled grave in your jewelry box, the good news is that fixing a broken chain is often far simpler than you'd think.
With just a couple of small, inexpensive tools, you can bring that beloved piece back to life in minutes. Mastering this simple repair technique is a game-changer, empowering you to handle most common jewelry mishaps right at home and keep your favorite accessories in rotation.
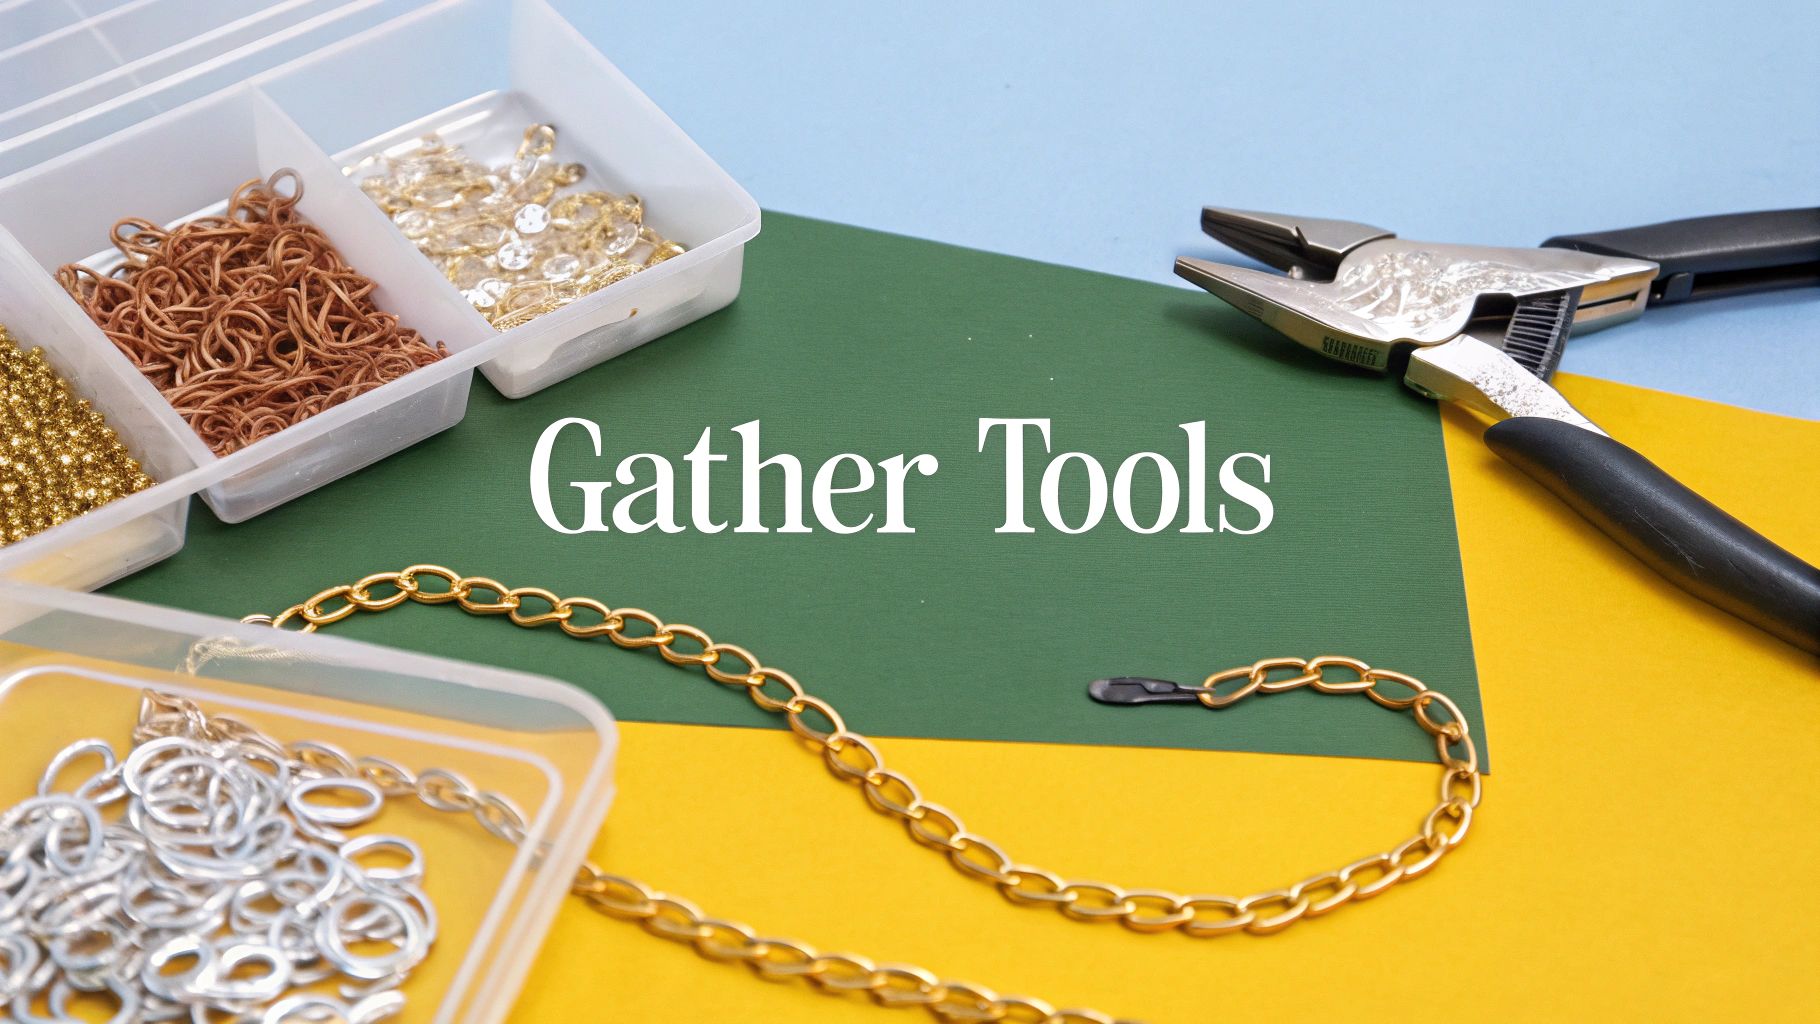
Your Essential Necklace Repair Toolkit
Before you dive in, let's talk about gear. Working with tiny, delicate components requires precision, and having the right tools on hand is the difference between a quick fix and a frustrating mess. A little prep work goes a long way toward a clean, professional-looking repair that actually lasts.
It turns out, you're not alone in wanting to fix your own jewelry. The global jewelry repair market hit around $7 billion in 2022 and is still climbing. This tells us that more people are choosing to cherish and maintain their valuables rather than just replacing them—a shift driven by both sentimental value and a more sustainable mindset. You can see more on this trend in this in-depth market analysis on VerifiedMarketReports.com.
Gathering Your Supplies
You don't need a full-blown jeweler's bench to get started. Just focus on a few key items that will make the job manageable and ensure a quality finish.
Here's a practical list of what you'll need in your kit:
- Two Pairs of Needle-Nose Pliers: This is non-negotiable. Ensure you get pliers with smooth jaws, not serrated ones. The ridged teeth on standard household pliers will scratch and damage the delicate metal of your chain. You need two pliers to grip both sides of a jump ring, giving you total control.
- Good Lighting: Trying to fix a tiny chain in a dim room is a recipe for eye strain and lost parts. Set yourself up at a well-lit desk or use a bright lamp to see exactly what you’re doing.
- A Magnifying Glass: This might feel like overkill, but a simple magnifier can be a lifesaver, especially with ultra-fine chains. It helps you clearly see the tiny gap in the jump ring you're trying to open or close.
- A Soft Work Surface: A small piece of felt, a microfiber cloth, or even a soft mouse pad is perfect. It stops your necklace from sliding around and, more importantly, catches any tiny components you might accidentally drop.
Key Takeaway: If you only buy one thing, invest in two pairs of smooth, needle-nose pliers from a craft store. Using the wrong tool is the #1 mistake people make, and it almost always leads to a scratched, messy-looking repair.
To keep everything in one place, some tips for organizing your repair supplies can make your workspace much more efficient. A tidy setup means you can find what you need, when you need it.
Essential vs. Optional Tools for DIY Chain Repair
Not sure what you absolutely need versus what's just nice to have? This table breaks it down to help you gather your supplies without overspending.
| Tool/Material | Essential or Optional? | Why You Need It |
|---|---|---|
| Two Needle-Nose Pliers | Essential | Provides the control needed to open and close jump rings without causing damage. You need one for each side. |
| Good Lighting | Essential | You can't fix what you can't see. Proper light prevents eye strain and mistakes. |
| Soft Work Surface | Essential | Keeps tiny parts from rolling away and protects your necklace from scratches. |
| Magnifying Glass | Optional | Highly recommended for fine chains. It makes seeing the tiny jump ring gap much, much easier. |
| Replacement Jump Rings | Essential | You'll need the right size and metal type to match your chain for a seamless repair. |
| Jewelry Polishing Cloth | Optional | Great for giving your piece a final shine and removing fingerprints after the repair is complete. |
Having the right tools ready to go makes all the difference. Once you have your essentials gathered, you’re more than halfway to a successful repair.
Diagnosing the Break to Find the Right Fix
Before you reach for your tools, you need to play detective. Not all breaks are created equal, and grabbing the wrong fix for the job can make things worse. Properly identifying the problem is the first—and most important—step toward an invisible, lasting repair.
So, take a close look at your necklace under some good light. The break will almost always fall into one of three common categories. Figuring out which one you're dealing with will save you a ton of time and frustration.
The Most Common Culprits
The vast majority of breaks happen at the chain's weakest points. These are the spots that see the most action and stress from everyday wear.
Here’s what you should be looking for:
- A Pulled-Open Jump Ring: This is, by far, the most frequent issue and thankfully, the easiest to fix. A jump ring is that tiny circle of metal connecting the clasp to the rest of the chain. Sometimes, a good tug is all it takes to pull it open.
- A Broken Clasp: The clasp itself can give out, especially the tiny spring mechanism inside a standard spring-ring clasp. If the little lever is stuck or just won't spring back into place, the whole clasp will need to be replaced.
- A Snapped Link: This is when a link in the actual chain has broken. It might have worn thin over time and finally given way, or it could have been snagged on a sweater and snapped clean through.
Pro Tip: Gently run the chain through your fingers. If you feel a rough or particularly thin spot, that’s a sign of serious wear and a potential future break point. It’s always smart to check for these while you're already making another repair.
How Chain Style Affects the Fix
The type of chain you have will have a big impact on how difficult the repair will be. A sturdy curb or cable chain with distinct, easy-to-access links is very forgiving for a DIY fix. You can easily isolate and work on a single link without much trouble. Knowing which chains are most durable is also key for creating layered looks; you can get some great ideas in our guide on how to layer necklaces.
On the other hand, more delicate and complex chains require a much gentler touch.
A box chain, for instance, is made of tiny, interlocking square links. When one of those breaks, just sticking a jump ring in the middle can look bulky and completely out of place. Likewise, a snake or herringbone chain is built from flat plates that are meant to lie perfectly flush—a break there almost always requires professional soldering to look seamless again.
Knowing your chain type helps you set realistic expectations for what you can achieve at home.
Mastering the Jump Ring Twist Technique
If you only learn one skill for fixing jewelry at home, make it this one. At least 90% of common necklace breaks come down to a failed jump ring. Learning how to properly open and close these tiny metal circles is the secret to a strong, seamless fix that actually lasts.
The single biggest mistake beginners make is yanking the jump ring open like they're breaking a wishbone. This immediately warps the ring, fatigues the metal, and makes it almost impossible to close flush again. A weak, gapped ring is just an open invitation for the chain to slip right back out.
The Correct Twisting Motion
The key to a secure fix is all in a simple twisting motion. This technique preserves the ring’s circular shape and tension, which means you'll get a tight, reliable closure when you're done. For this, you’ll need your two pairs of smooth, needle-nose pliers.
Imagine the split in the jump ring is sitting at the 12 o'clock position. Here’s how you do it:
- Get a Good Grip: Hold the ring on either side of the split. Grab it at the 3 o’clock position with one pair of pliers and the 9 o’clock position with the other.
- Twist, Don't Pull: Instead of pulling the ends apart, gently twist your hands in opposite directions. Think of it like this: roll one hand toward your body while rolling the other away from you. This opens the ring sideways, creating just enough of a gap to slide your chain link or clasp inside.
Getting a Perfect Closure
Closing the ring securely is just as critical as opening it correctly. Once you have your chain or clasp attached, just reverse the twisting motion. Gently guide the ends back toward each other until they meet up perfectly flush.
Pro Tip: Listen closely when you’re closing the ring. A perfectly aligned closure will often make a faint 'click' or 'snap' sound as the two ends meet. That’s your signal that the connection is solid and secure.
This fundamental skill won’t just help you fix your current broken necklace. It gives you the confidence to handle all sorts of future jewelry repairs with ease.
Rejoining Your Broken Chain with a New Link
Alright, with your tools laid out and a clear workspace, it's time to dive into the actual repair. Whether your chain snapped right at the clasp or a link gave out somewhere in the middle, the fix is surprisingly straightforward once you know the steps. Just remember, a steady hand and a bit of patience are your best assets here.
The easiest scenario is a clean break where the chain meets the clasp. If this is what you're dealing with, your only job is to bridge that small gap with a new jump ring. This is a perfect first-time repair because you barely have to touch the chain itself.
This handy chart breaks down how to pick the right materials to make your fix virtually invisible.
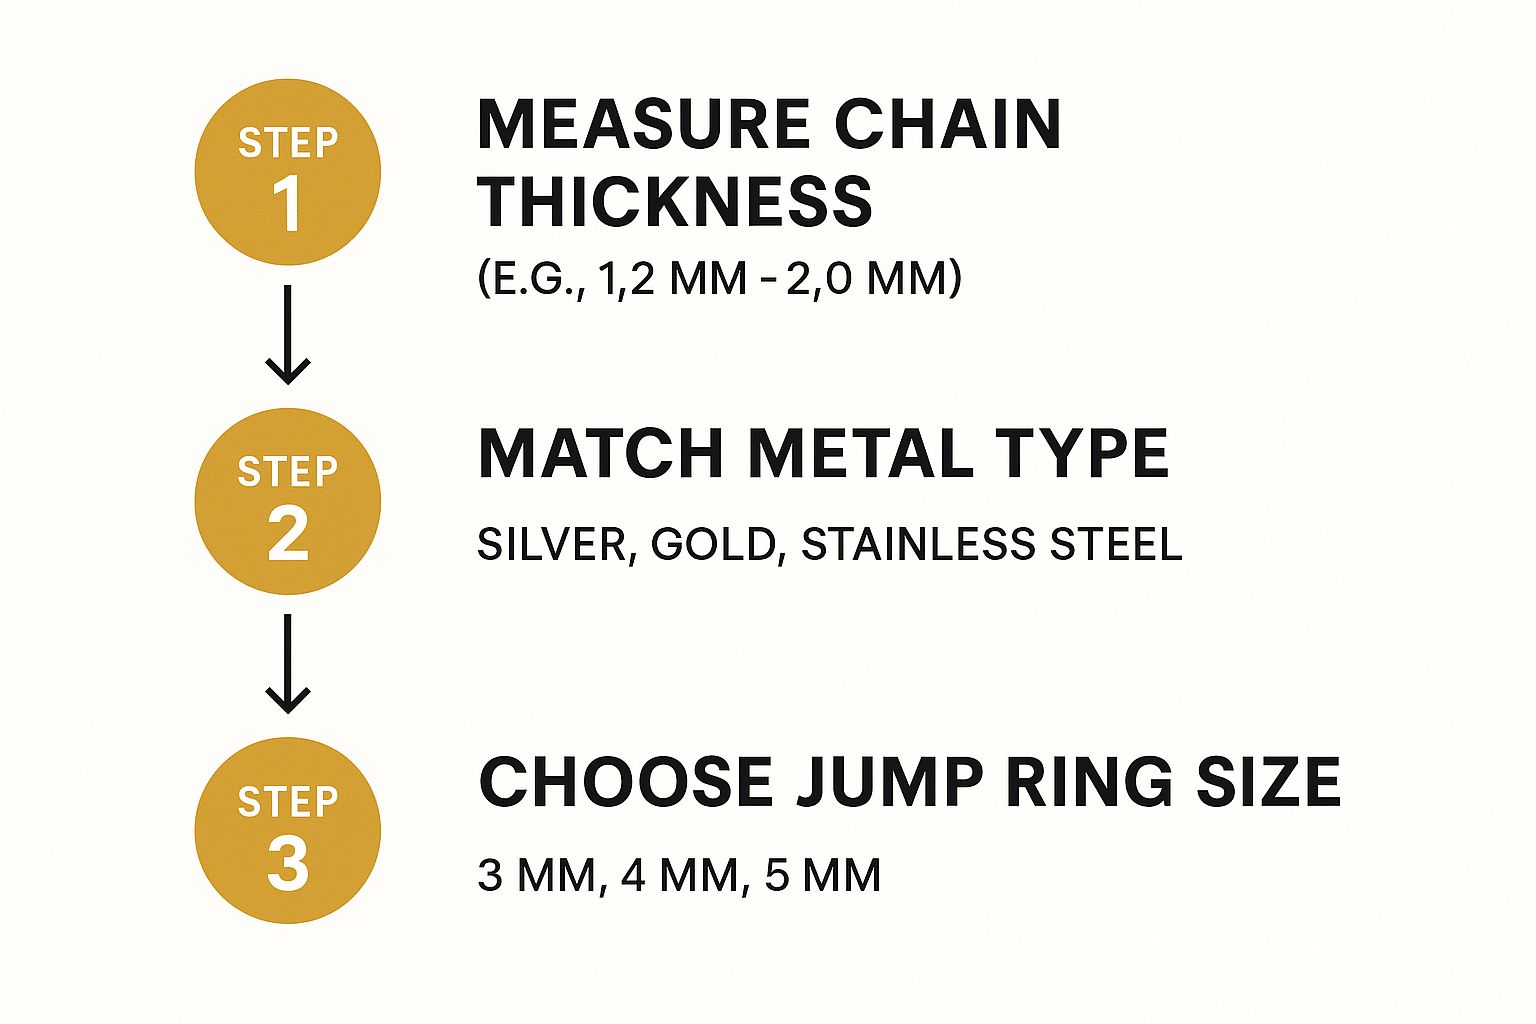
As you can see, matching the metal, thickness, and ring size is the secret to a repair that’s both strong and seamless. Now, if your chain snapped somewhere in the middle, the job is a little more involved, but totally manageable.
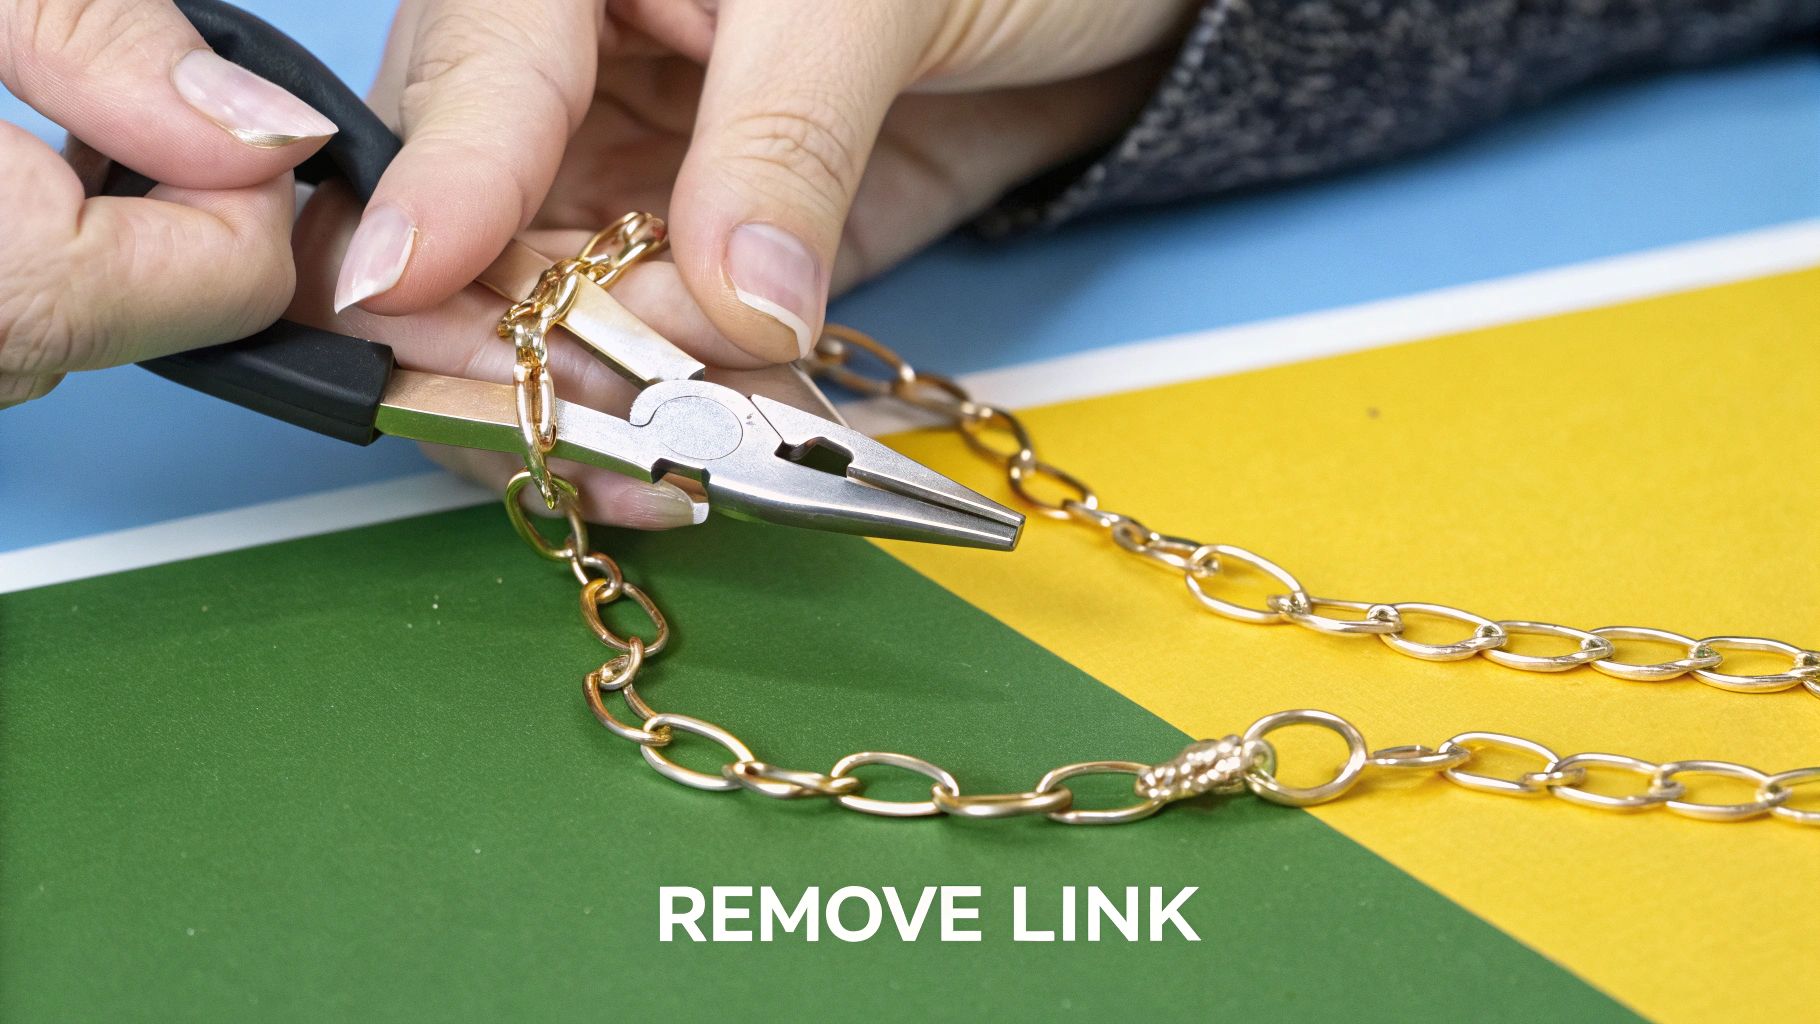
Removing the Damaged Link
When a link breaks mid-chain, your first task is to get that broken piece out of the way. Don't try to bend it back into shape. That link is already compromised and will just break again.
Instead, grab your pliers and gently twist open the healthy links on either side of the broken one. Once they’re open, the damaged link should slide right out. You’ll be left with two clean, open ends ready to be reconnected—a much more reliable fix.
Integrating the New Jump Ring
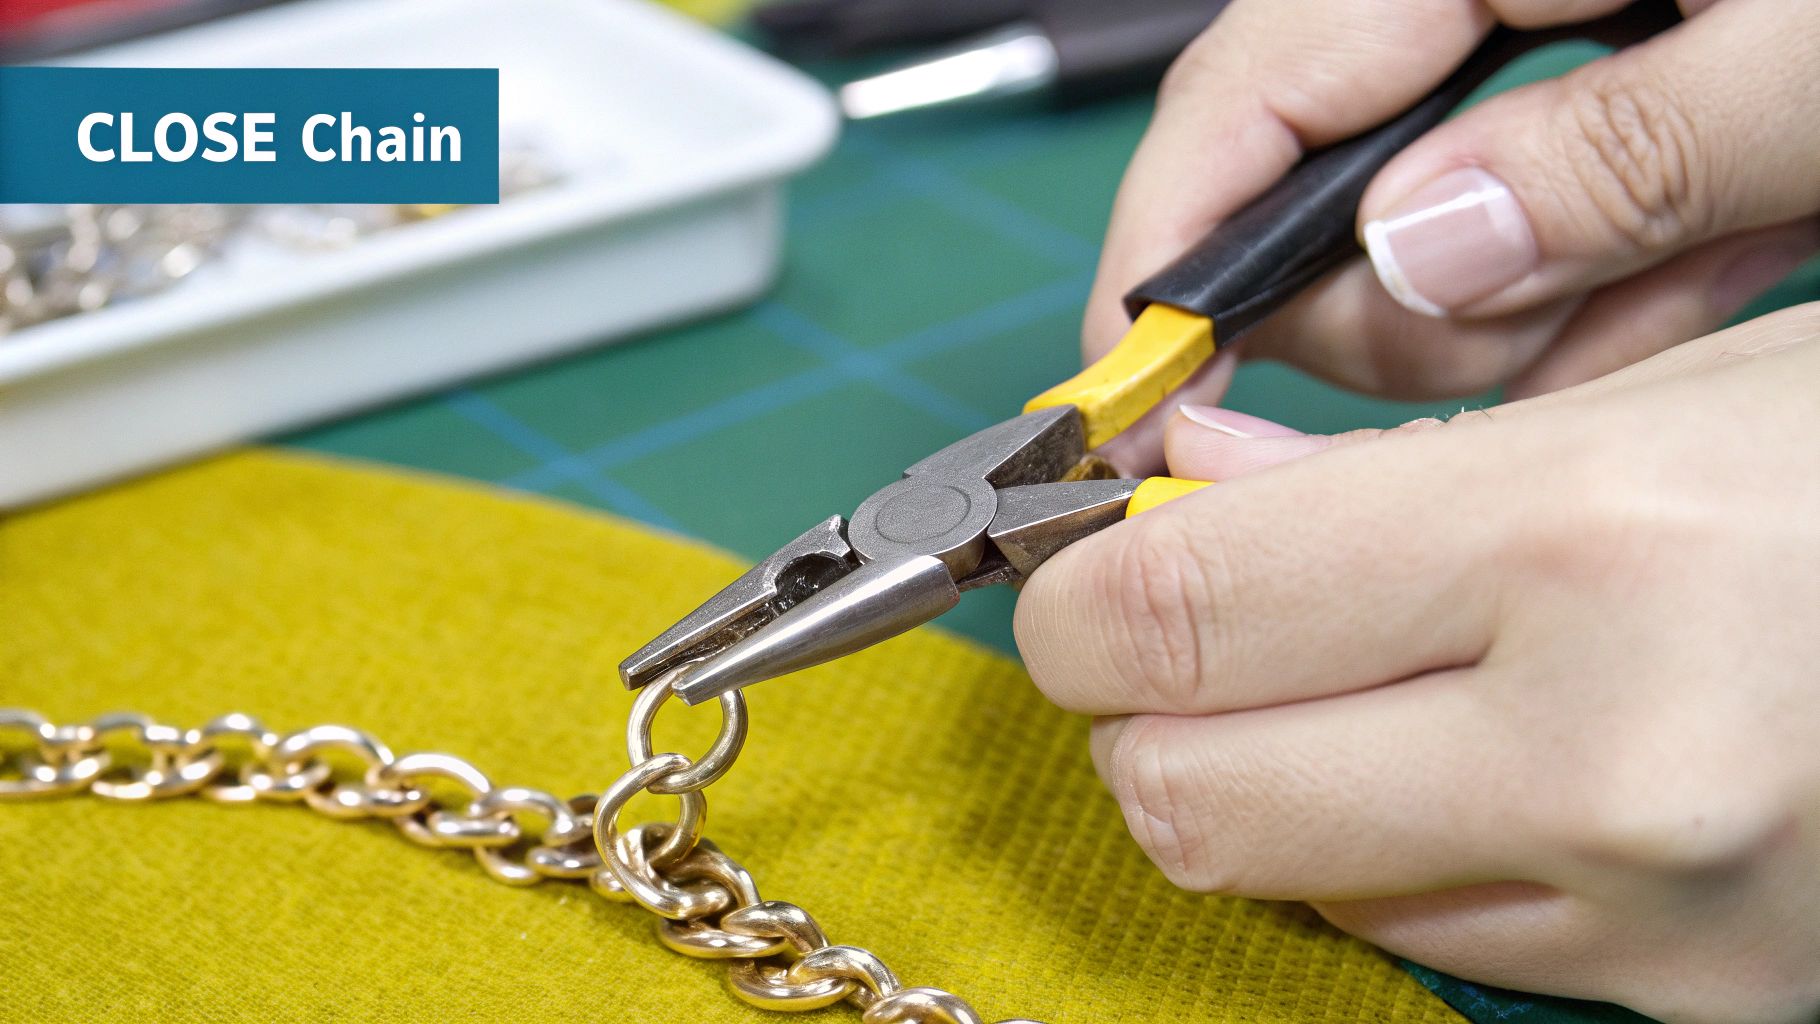
With the broken piece gone, you're ready to add your new jump ring. Use that same twisting motion to open the new ring just wide enough to slip one end of the chain onto it. Then, slide the other end of the chain onto the same ring.
Key Insight: You want this new jump ring to blend in perfectly, almost like it was always part of the chain's pattern. Choosing a ring that’s the same size and thickness as the original links is what makes the repair truly disappear.
Finally, twist the jump ring closed. You might hear a faint "click" as the ends meet flush, which is a great sign of a secure fit. This kind of detailed work is exactly why there’s such a healthy market for jewelry repair professionals. In fact, independent jewelers make up about 50% of the market, with large national chains holding around 40%. You can dig deeper into these industry stats in this detailed jewelry repair service report on marketreportanalytics.com.
Keeping Your Necklaces Safe and Strong
Knowing how to fix a broken necklace is a great skill to have, but preventing the break in the first place is even better. A few simple habits can dramatically extend the life of your favorite pieces, keeping them strong and wearable for years.
It all starts with storage. Tossing your necklaces into a drawer is a surefire way to create a tangled mess that puts stress on delicate links and clasps. Those knots and snags create weak points that eventually snap. Instead, give your necklaces their own space. A jewelry tree or even individual soft pouches will keep the chains separated and free from tangles. This one small change can prevent the vast majority of accidental breaks.
Smart Habits for Lasting Jewelry
Developing a mindful routine for when you wear and clean your jewelry makes a huge difference, too. Over time, exposure to certain chemicals and elements can degrade the metal, making it brittle and more prone to damage.
Here are a few simple preventative habits to get into:
- Take your jewelry off before bed. Tossing and turning at night can easily snag a delicate chain on your bedding or even in your hair.
- Keep it away from moisture and chemicals. Always remove necklaces before you hop in the shower, go for a swim, or apply lotions and perfumes. Things like chlorine can accelerate tarnish and seriously weaken the metal.
Regular, gentle cleaning is another game-changer. The oils from your skin and general dirt buildup can actually contribute to metal degradation over time. To learn more, check out our guide on what causes jewelry to tarnish and how to fight it. By adding these small steps to your routine, you’re protecting your most cherished pieces from unnecessary wear and tear.
Time to Call in the Pros? Knowing When to Step Away
Fixing a simple break yourself can feel incredibly satisfying, but there are times when putting down the pliers is the smartest move you can make. Knowing when a job is beyond a DIY fix can be the difference between a beautifully restored necklace and a permanently damaged treasure.
Let's be honest: if the piece has serious sentimental or monetary value, the risk of a home repair attempt usually isn’t worth it.
Think about intricate chains like rope, snake, or herringbone styles. These aren't just simple loops connected together; they require specialized tools and techniques to repair seamlessly. Trying to force a jump ring into one of these can look clumsy at best and cause more damage at worst. High-value metals like gold and platinum almost always need professional soldering to create a bond that's both invisible and strong enough for daily wear.
Key Takeaway: If the thought of making a mistake fills you with dread, that's your gut telling you to stop. Handing your jewelry over to a professional with the right experience gives you peace of mind and protects your investment.
When to Make the Call to a Jeweler
So, how do you decide when to get an expert involved in how to fix a broken chain on a necklace? It really boils down to a few critical situations. You should always seek out a professional if:
- The links are hollow. Many chains are made with hollow links to keep them lightweight and affordable, but they can be crushed in an instant with a pair of pliers.
- A link in a complex chain is broken. We're talking about box, wheat, or rope chains where a single snapped link can't be easily replaced.
- The repair needs heat. Soldering is the gold standard for a durable, permanent fix, and it's definitely not a DIY task.
- The piece is irreplaceable. If it’s an antique, a family heirloom, or just holds too many memories, don't risk it.
These scenarios are exactly why skilled jewelers are in demand. Chain and clasp repair is a huge part of the global jewelry repair market, which was valued at around $10 billion in 2023. You can learn more about the jewelry repair service market and see just how much it's expected to grow.
Common Questions About Necklace Repair
Jumping into your first necklace repair can bring up a few last-minute questions. Getting those answers sorted out is the key to feeling confident and getting the job done right. Here are some of the most common things people ask right before they get started.
Can I Use Regular Household Pliers?
No, we strongly advise against it. Regular pliers found in a toolbox are built with serrated (ridged) jaws designed for heavy-duty gripping. These ridges will absolutely scratch, dent, and weaken the soft metal of your necklace chain and links.
For a clean, damage-free fix, you need two pairs of smooth, needle-nose pliers. You can find them for just a few dollars at any craft store, and they are essential for this kind of precise work.
How Do I Find a Matching Jump Ring?
The easiest way to get a perfect match is to take the broken necklace to a jewelry supply or craft store. You can hold different jump rings right next to your chain to match the color, thickness, and finish on the spot, eliminating guesswork.
If you can't go to a store, use a ruler with millimeter markings to measure the diameter of a healthy link on your chain and look for jump rings of a similar size online. For most costume jewelry, an inexpensive plated ring is fine. If you're fixing something made of sterling silver or gold, a jeweler can help you find a solid metal ring that will blend in seamlessly.
Expert Tip: When in doubt, it's often a good idea to choose a jump ring that's slightly thicker than the original links. This adds a little extra strength right at the connection point, making your repair much more durable.
Is Fixing a Very Thin Chain a DIY Job?
It depends on the break. If the break is right at the clasp and you just need to reattach it with a jump ring, you can probably handle it with a steady hand, a magnifier, and good lighting.
However, if a link has snapped somewhere in the middle of an ultra-fine chain (like a delicate box or snake chain), it’s best to see a professional. The links are often too tiny and fragile for a home repair. Jewelers have specialized tools, like laser welders, that can make a nearly invisible repair without damaging the surrounding links.
For beautiful, affordable jewelry that's built to last, explore the stunning collections at Precious Pulse Jewelry. Find your next favorite piece today at https://preciouspulsejewelry.com.