Is your morning routine a frantic search for a matching earring? Do you spend precious minutes untangling a favorite necklace? Your beautiful jewelry collection, whether it's a few cherished pieces or a growing treasure trove, deserves better than a cluttered box. A well-organized system not only saves you time but also protects your pieces from scratches and damage, ensuring you can enjoy them for years to come. Proper storage keeps delicate items pristine and makes your daily selection process a joy rather than a chore.
In this guide, we explore eight creative and practical DIY jewelry storage ideas that you can create this weekend. We will cover projects ranging from simple repurposing hacks to stunning custom displays that double as wall art. Each idea is broken down with a clear list of what you'll need and actionable steps, providing a solution for every style, space, and skill level. For those looking to enhance their setup, we'll also suggest useful organizing products that can complement your DIY efforts. Get ready to transform your jewelry chaos into a beautifully curated and perfectly functional display.
1. Ice Cube Tray Jewelry Organizer
What is the easiest way to organize small jewelry like rings and stud earrings? One of the simplest yet most effective DIY jewelry storage ideas is the humble ice cube tray. Its individual compartments are perfectly sized for your smallest treasures, such as rings, stud earrings, and delicate pendants. This grid-like structure provides an instant solution for preventing tangles and keeping pairs of earrings together, offering a clear, at-a-glance view of your collection.
This idea is ideal for anyone who needs to quickly organize many small items without a big investment. The trays slide perfectly into dresser drawers, keeping your jewelry out of sight but neatly arranged. You can also stack them on a shelf to maximize vertical space.
How to Implement This Idea
The beauty of this project lies in its customizability. For a minimalist look, a simple, clean tray works perfectly. To elevate the design, you can easily spray paint a standard plastic tray in a metallic gold or soft pastel for a more chic, personalized touch. For pieces that require extra care, lining the compartments is an excellent option.
What you'll need:
- An ice cube tray (plastic or silicone)
- Optional: Spray paint, adhesive-backed felt or velvet
Practical steps:
- Clean the Tray: Ensure the ice cube tray is completely clean and dry.
- Customize (Optional): If painting, apply a light, even coat of spray paint in a well-ventilated area and let it dry completely.
- Add Liners (Optional): Cut small squares of adhesive-backed felt or velvet and press them firmly into the bottom of each cube. This soft lining prevents scratches on delicate metals and gemstones.
- Organize: Sort your rings, earrings, and small pendants into the individual compartments.
Why This Method Works
This approach excels in its practicality and accessibility. It transforms a common, inexpensive item into a highly functional organizer.
Key Insight: The true benefit of the ice cube tray method is its modularity. You can use different colored trays to categorize your jewelry by type (e.g., blue for silver, pink for gold) or style, creating a system that is both visual and intuitive. For an even more professional feel, consider purchasing pre-made velvet drawer inserts, which offer a similar compartmentalized layout with a luxurious finish.
2. Cork Board or Bulletin Board Display
How can I store my necklaces and dangle earrings so I can see them all? A simple cork board offers one of the most versatile DIY jewelry storage ideas, transforming an office supply into functional wall art. This method is perfect for hanging necklaces, bracelets, and dangling earrings, preventing tangles while keeping everything visible and accessible. By using decorative pins and hooks, you can create a custom display that doubles as a personalized decor element.
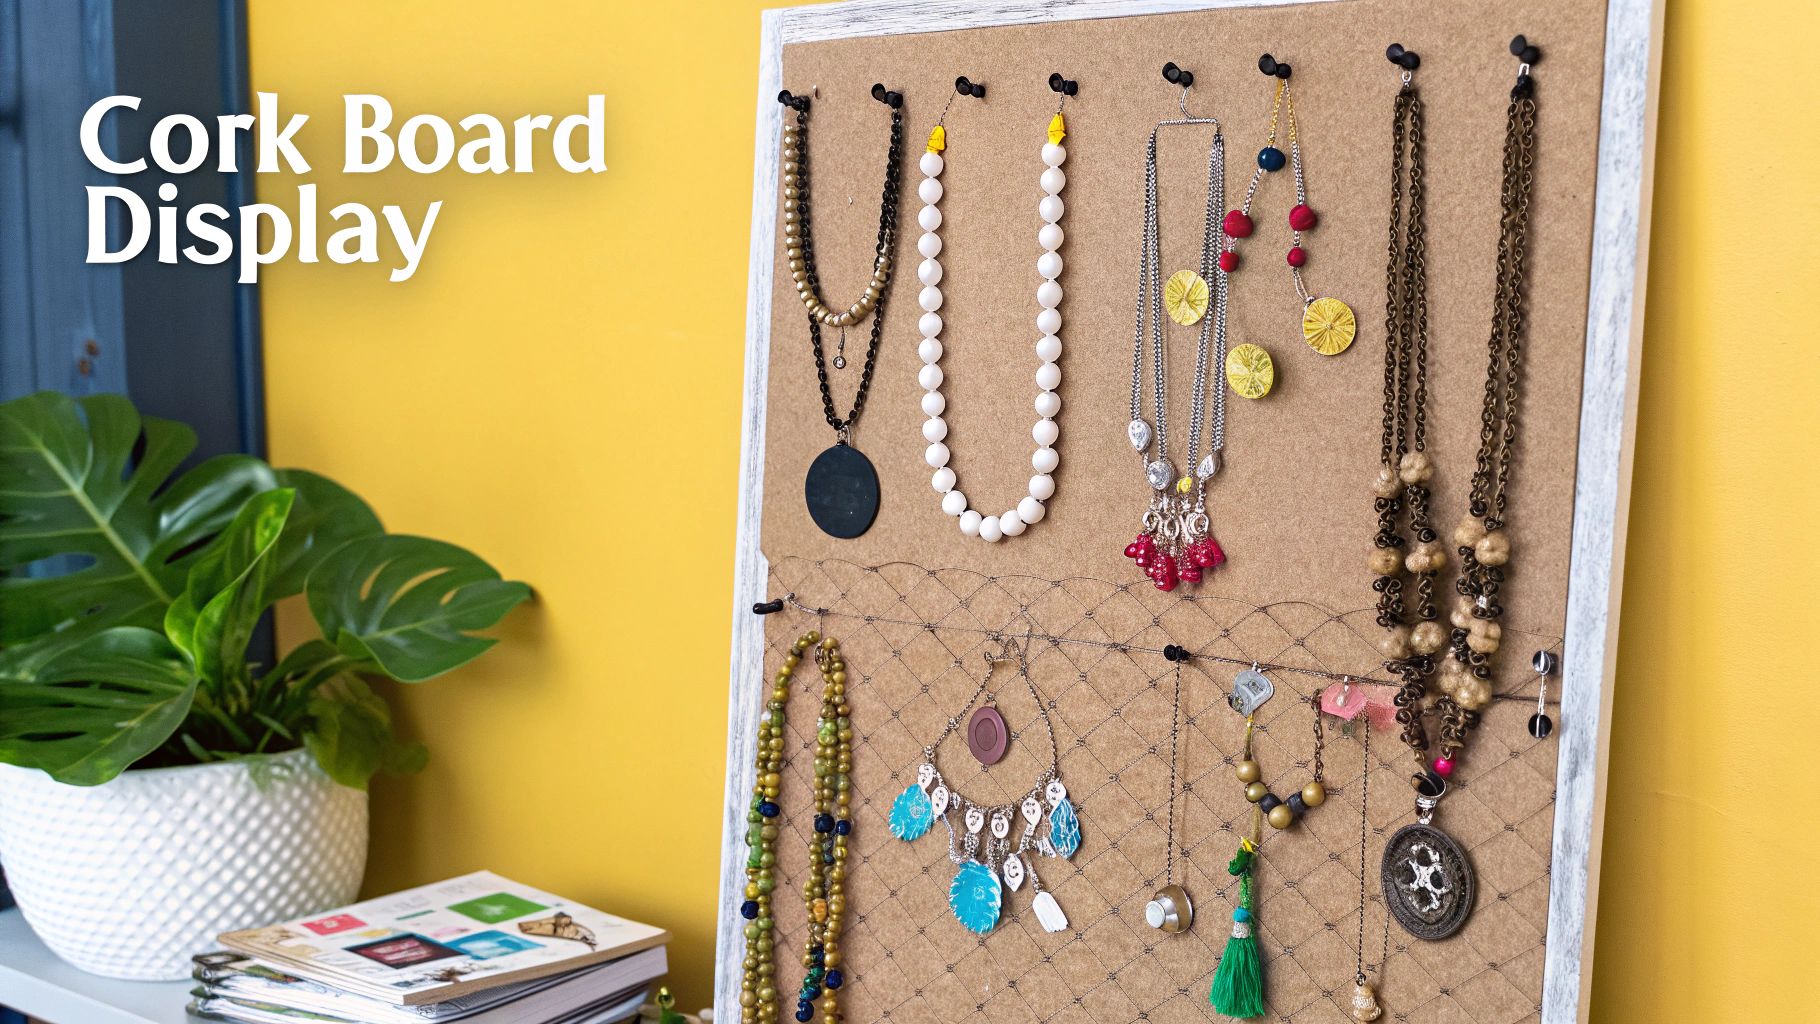
This idea is particularly suited for those with a large collection of statement pieces that deserve to be shown off. It keeps your favorite accessories in plain sight, making it easier to choose the perfect piece for your outfit. A cork board can be scaled and styled to fit any space, from a walk-in closet to a small dorm room.
How to Implement This Idea
The true appeal of a cork board display is how easily it can be customized. Leave the cork natural for a rustic look, or elevate it with simple modifications. For a more polished appearance, place the cork board inside an ornate frame to instantly turn it into a chic decor piece.
What you'll need:
- A cork board
- Decorative push pins, T-pins, or small hooks
- Optional: Fabric, staple gun, ornate picture frame, ribbons
Practical steps:
- Prepare the Board: If desired, wrap the board in fabric that complements your room's decor, securing it with a staple gun on the back.
- Frame it (Optional): For a high-end look, mount the fabric-covered board inside a vintage-style frame.
- Arrange Pins and Hooks: Strategically place decorative push pins or small screw-in hooks across the board to hang necklaces and bracelets.
- Create Zones: Use crisscrossing ribbons or washi tape to create designated sections for different types of jewelry.
Why This Method Works
This approach is celebrated for its ability to merge storage with decoration. It utilizes vertical wall space, which is especially valuable in smaller living areas, and turns your jewelry collection into an evolving piece of art.
Key Insight: The cork board method shines because it keeps your jewelry untangled and ready to wear. By hanging necklaces and bracelets, you avoid the frustrating knots that form in traditional jewelry boxes. This visual inventory also reminds you of pieces you might otherwise forget, encouraging you to wear your entire collection.
3. Vintage Frame Jewelry Holder
How can I create jewelry storage that looks like decor? A vintage frame jewelry holder is an exceptionally elegant choice. This DIY jewelry storage idea involves upcycling an old or thrifted picture frame, transforming it into a beautiful display for your earrings, necklaces, and bracelets. By replacing the glass and backing with a functional material like wire mesh or lace, the frame becomes a stunning and practical organizer.
This project is perfect for those who want to showcase their jewelry as part of their room's decor. It’s particularly suited for hanging earrings and longer necklaces. Grouping multiple frames of different sizes and styles can create a captivating gallery wall, blending organization with a shabby-chic or vintage aesthetic.
How to Implement This Idea
The core of this project is replacing the frame's original backing. Carefully remove the glass and backing, then choose a material that fits your style and secure it tightly to the back of the frame with a staple gun or strong glue.
What you'll need:
- An old picture frame
- Backing material (wire mesh, lace, or ribbon)
- A staple gun or strong glue
- Optional: Small cup hooks
Practical steps:
- Prep the Frame: Remove the glass and original backing. If desired, paint or distress the frame to match your decor.
- Attach the Backing: Cut your chosen material (wire mesh for an industrial look, lace for a romantic feel) to size and staple it securely to the back of the frame, ensuring it's taut.
- Add Hooks (Optional): For extra functionality, screw small cup hooks along the bottom edge of the frame. This creates the perfect spot for hanging necklaces and bracelets.
- Hang and Organize: Mount the frame on the wall and hang your earrings through the mesh or lace.
Why This Method Works
This approach excels by turning a storage problem into a decorative opportunity. It moves your jewelry off cluttered surfaces and onto the wall, saving space while adding a personalized artistic touch.
Key Insight: The true benefit of this method is its complete customizability. You can paint any frame to match your decor, from a gold ornate style for a glamorous look to rustic weathered wood for a cottage-core vibe. The combination of frame style and backing material allows you to create a one-of-a-kind piece that perfectly reflects your personal taste.
4. Branched Tree Jewelry Stand
What's a unique way to display necklaces and bracelets on a dresser? For a solution that doubles as natural art, a DIY branched tree jewelry stand is an exceptional choice. This idea uses a real tree branch or piece of driftwood, mounted on a sturdy base, to create an organic, sculptural display. Its various twigs provide numerous hanging points for necklaces, bracelets, and rings, preventing tangles while showcasing your collection beautifully.
This method is perfect for anyone with a bohemian, rustic, or nature-inspired decor style. It transforms your jewelry into a dynamic centerpiece for a dresser or vanity. It's one of the most versatile diy jewelry storage ideas, adaptable to any scale.
How to Implement This Idea
Creating your own branch stand is a rewarding project. Before starting, prepare your branch by baking it at 200°F for about two hours to dry it out and eliminate any pests.
What you'll need:
- A sturdy tree branch
- A base (wood block, small pot)
- Adhesive (epoxy, plaster, or concrete)
- Optional: Sandpaper, spray paint, clear polyurethane
Practical steps:
- Prepare the Branch: Clean and bake the branch. Lightly sand any rough spots to prevent snags.
- Customize the Look: Leave the wood natural, or spray paint it metallic gold for glamour or crisp white for a modern look.
- Create a Sturdy Base: Secure the branch in your chosen base. You can set it in plaster inside a small pot or drill a hole into a wood block and fix it with strong epoxy.
- Seal and Finish: Apply a coat of clear polyurethane to protect the wood and give it a polished finish.
For a visual guide on crafting a stylish base for your stand, check out this tutorial:
Why This Method Works
This approach is celebrated for its blend of form and function. It offers a practical way to keep necklaces from tangling while adding a unique, decorative element to your space. Because no two branches are alike, your jewelry holder will be one-of-a-kind. It's also a fantastic way to display jewelry at craft shows or in a boutique setting. Find more creative jewelry display ideas on preciouspulsejewelry.com to elevate your presentation.
Key Insight: The success of a branched tree stand lies in selecting the right branch. Look for one with a strong main stem and plenty of smaller, well-spaced offshoots at varying heights. This ensures you have ample room to hang pieces of different lengths without them overlapping and tangling.
5. Drawer Divider System with Foam Inserts
How can I store my valuable jewelry safely and out of sight? For a professional and concealed solution, create a drawer divider system with foam inserts. This method involves sectioning off a drawer with adjustable dividers and lining the compartments with custom-cut foam or velvet trays. The result is a secure, elegant space where every piece has a designated spot, protected from dust and damage.
This idea is perfect for those who prefer hidden storage that is both accessible and sophisticated. It keeps your countertops clear while transforming a standard drawer into a custom jewelry vault. While you can find high-end systems at stores, this DIY approach brings that luxury design into your home for less.
How to Implement This Idea
The key to this system is precise measurement and thoughtful layout planning. Start by measuring the interior dimensions of your chosen drawer. You can then use expandable bamboo dividers or custom-cut wood slats to create the main grid.
What you'll need:
- Drawer dividers (expandable or custom-cut)
- High-density foam or pre-made velvet jewelry trays
- A craft knife
- Optional: Anti-tarnish cloth
Practical steps:
- Measure and Divide: Measure your drawer and install dividers to create compartments tailored to your collection.
- Create Inserts: Cut high-density foam to fit snugly within each compartment. Use a craft knife to slice slits for rings or create custom shapes for specific pieces. Alternatively, purchase stackable velvet jewelry trays that fit your drawer dimensions.
- Add Protection (Optional): Line the bottom of each compartment with anti-tarnish cloth before adding inserts to protect sterling silver.
- Arrange Your Jewelry: Place each piece in its designated, cushioned spot.
Why This Method Works
This approach provides one of the most protective diy jewelry storage ideas available. Each piece is individually cushioned, preventing scratches and tangles. The hidden nature of the storage also offers a layer of security and maintains a minimalist aesthetic.
Key Insight: The true power of this method lies in its complete customization. You can design a layout tailored specifically to your collection, ensuring that long necklaces, chunky bracelets, and delicate rings all have a perfectly sized home. Many craft and container stores sell customizable drawer organizers and foam inserts to make this project even easier.
6. Repurposed Ladder Jewelry Display
I have a lot of long necklaces. What's a good way to store them? For a statement piece that blends function with rustic charm, consider a repurposed wooden ladder. This creative vertical storage solution uses the rungs as tiers for hanging necklaces, scarves, and bracelets, preventing tangles while turning them into a decorative feature. It’s an eye-catching element that maximizes wall space, perfect for bedrooms with a farmhouse or shabby-chic aesthetic.
This idea is ideal for those with a large collection of long necklaces that are difficult to store. By leaning a vintage ladder against a wall or mounting it horizontally, you create an expansive and accessible display where you can see all your pieces at once.
How to Implement This Idea
The appeal of this DIY jewelry storage idea is its versatility. First, ensure the ladder is clean and smooth. You can sand and seal a natural wood ladder to preserve its rustic look or paint it to match your decor.
What you'll need:
- A small wooden ladder (decorative or repurposed)
- Optional: Sandpaper, paint or wood stain, S-hooks, small baskets, L-brackets
Practical steps:
- Prep the Ladder: Clean and sand the ladder to remove any splinters. Paint or stain it if desired.
- Add Hanging Hardware: Place S-hooks over the rungs to provide more hanging options and make it easier to grab individual necklaces.
- Incorporate Baskets: Attach small wire or woven baskets to the steps. These are perfect for holding smaller items like rings or brooches.
- Secure for Safety: If using a larger ladder, secure it to the wall with L-brackets near the top to prevent it from slipping.
Why This Method Works
This approach transforms a functional object into a stunning piece of decor. It offers a large-scale, open-storage solution that is both practical and visually appealing.
This quick reference summarizes the key features of using a ladder for jewelry organization.
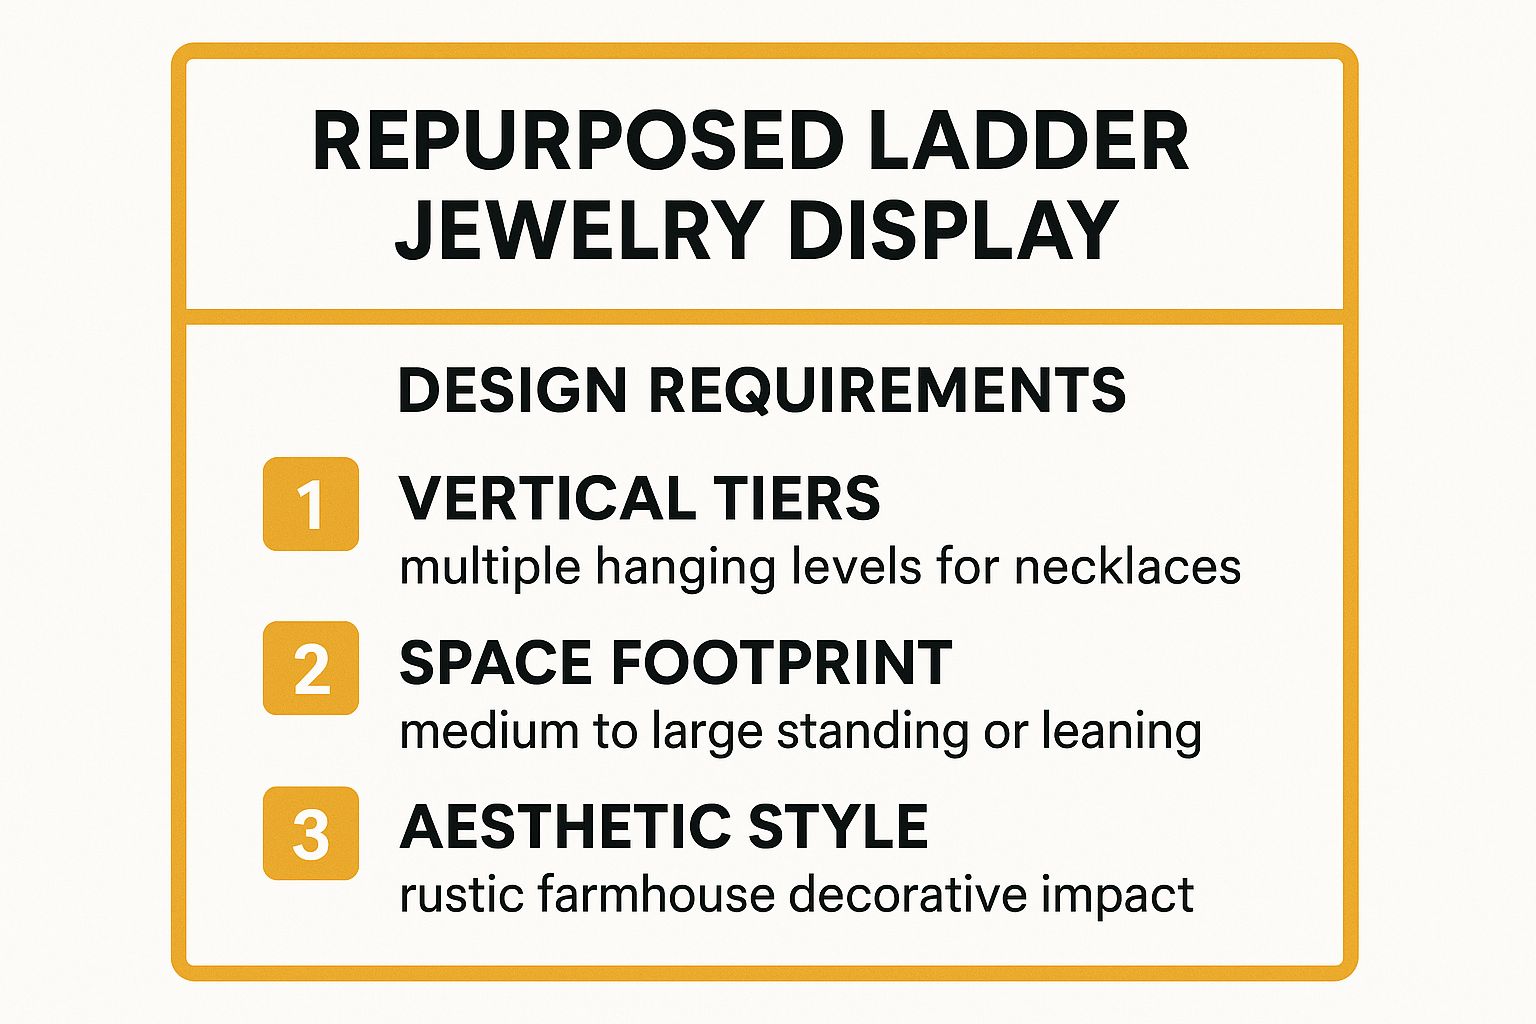
The summary highlights how this method effectively combines vertical storage with a distinct rustic aesthetic, making it more than just an organizer.
Key Insight: The true advantage of the ladder display is its scale and impact. It’s not just for jewelry; it can also hold scarves and belts. For a smaller-scale version, use a miniature decorative ladder on a vanity to hold your most frequently worn pieces.
7. Decorative Dish and Tray Organization
How can I organize the jewelry I wear every day? For an effortlessly elegant solution, use your collection of decorative dishes, trinket trays, and small bowls. This method transforms beautiful serveware and catchalls into a curated display for your most-loved pieces. By arranging items on a dresser or nightstand, you create an artistic vignette that keeps your daily-wear jewelry accessible and beautifully organized.
This idea is perfect for those who want their storage to double as decor. It’s particularly effective for the jewelry you reach for every day, preventing cluttered piles from forming on your surfaces. Combining various shapes and materials like marble trays, ceramic ring cones, and vintage teacups adds personality to your space.
How to Implement This Idea
The key to this approach is intentional curation. Start by gathering dishes that match your personal style. A cohesive look can be achieved by sticking to a specific color palette or material family, such as mixing various brass and gold-toned dishes.
What you'll need:
- A collection of small dishes, trays, bowls, or saucers
- Optional: A larger tray, a tiered dessert stand, ring cones
Practical steps:
- Gather Your Pieces: Shop your own home for unused saucers, small bowls, or decorative trays.
- Create a Defined Zone: Place several smaller dishes on a larger tray. This contains the collection and makes it look intentional rather than cluttered.
- Assign Roles: Use a small bowl for rings, a rectangular tray for necklaces, and a saucer for earrings.
- Add Height: Incorporate a tiered dessert stand or a ring cone to add vertical interest and create more storage space.
Why This Method Works
This method champions the idea that storage can be beautiful. It allows you to showcase your jewelry as part of your room’s decor, turning organization into self-expression. Many home decor and jewelry stores sell beautiful trinket dishes and ring holders that are perfect for this. For more inspiration on creating eye-catching arrangements, explore some great jewelry display ideas on preciouspulsejewelry.com.
Key Insight: The success of this method lies in variety and balance. Incorporate items of different heights, such as ring cones or small jewelry trees, alongside your flat trays and bowls. This contrast creates visual interest and ensures each piece is easy to see and grab, transforming a simple surface into a chic and functional jewelry station.
8. Pegboard Wall Jewelry Organizer
My jewelry collection is huge and still growing. What's a storage solution that can expand with it? A pegboard wall organizer is an exceptionally versatile choice. This system uses a perforated hardboard panel, allowing you to arrange hooks, pegs, and shelves in any configuration you desire. It’s a perfect DIY jewelry storage idea for transforming an empty wall into a functional and visually appealing display for your entire collection.
This method is ideal for those with a growing collection who need a system that can adapt over time. Whether placed in a walk-in closet or behind a bedroom door, a pegboard keeps every piece visible and accessible. It’s a favorite among craft enthusiasts for its blend of utilitarian function and modern style.
How to Implement This Idea
Creating your own pegboard station is straightforward. Start with a standard pegboard panel from a hardware store and personalize it to fit your aesthetic. You can paint it to match your wall color for a subtle look or choose a bold, contrasting shade to make it a statement piece.
What you'll need:
- A pegboard panel
- Pegboard hooks, pegs, and accessories (baskets, shelves)
- Screws and anchors for mounting
- Optional: Paint, wood for a frame
Practical steps:
- Customize the Board: Paint the pegboard your desired color and let it dry. For a more polished look, build a simple wooden frame around it.
- Mount Securely: Mount the pegboard to the wall, leaving a small gap behind it so the hooks can be inserted properly.
- Arrange Accessories: Insert a variety of hooks, pegs, and baskets. Use longer pegs for bracelets and small J-hooks for individual necklaces. You can find more tips on how to store necklaces without tangling on preciouspulsejewelry.com.
- Organize Your Collection: Hang your jewelry, dedicating zones for different types to keep everything orderly.
Why This Method Works
The pegboard's strength lies in its complete adaptability. It moves beyond simple storage to become an interactive display of your personal style. You can rearrange it in minutes to accommodate new pieces or simply to refresh the look.
Key Insight: To maximize organization, plan your layout before drilling any holes. Lay the pegboard on the floor and arrange your jewelry and hooks to find the optimal configuration. This ensures every piece has a designated spot and the final display is both balanced and functional.
8 DIY Jewelry Storage Ideas Comparison
| Jewelry Organizer Type | Implementation Complexity 🔄 | Resource Requirements 💡 | Expected Outcomes 📊 | Ideal Use Cases 💡 | Key Advantages ⭐⚡ |
|---|---|---|---|---|---|
| Ice Cube Tray Organizer | Low 🔄 | Minimal, repurposed trays 💡 | Tangle-free small jewelry storage 📊 | Small collections, earrings, rings, delicate chains 💡 | Affordable ⭐, portable ⚡, customizable ⭐ |
| Cork Board/Bulletin Display | Low to Moderate 🔄 | Cork board, pins/hooks 💡 | Visible, decorative wall display 📊 | Statement necklaces, costume jewelry, visual display 💡 | Inexpensive ⭐, easy rearrangement ⭐ |
| Vintage Frame Holder | Moderate 🔄 | Vintage frames, wire mesh 💡 | Artistic/vintage display 📊 | Vintage/shabby-chic style, earrings, lightweight necklaces 💡 | Unique design ⭐, eco-friendly ⭐ |
| Branched Tree Jewelry Stand | Moderate to High 🔄 | Natural branches, base materials 💡 | Sculptural, natural jewelry display 📊 | Necklaces, bracelets, watches, bohemian aesthetic 💡 | Eco-friendly ⭐, artistic ⚡, sturdy ⭐ |
| Drawer Divider System with Foam | High 🔄 | Custom dividers, foam/velvet inserts 💡 | Professional-grade, protected storage 📊 | Valuable collections, hidden storage, high organization 💡 | Secure storage ⭐, reduces tarnishing ⭐ |
| Repurposed Ladder Display | Moderate 🔄 | Wooden ladder, hooks/containers 💡 | Vertical tiered display 📊 | Large necklace collections, rustic/farmhouse aesthetics 💡 | Vertical space use ⚡, visual impact ⭐ |
| Decorative Dish and Tray | Low 🔄 | Decorative dishes/trays 💡 | Accessible, artistic display 📊 | Daily-wear jewelry, vanity or bathroom display 💡 | Easy setup ⚡, aesthetic ⭐, portable ⚡ |
| Pegboard Wall Organizer | Moderate 🔄 | Pegboard, hooks, shelves 💡 | Highly customizable, expandable 📊 | Large collections, craft rooms, closets 💡 | Versatile ⭐, expandable ⚡, efficient ⭐ |
From Clutter to Creation: Your Next Step to Jewelry Bliss
Navigating the world of jewelry storage can often feel as tangled as a forgotten necklace chain. However, the solution doesn't require a hefty price tag. The journey from a cluttered drawer to a beautifully curated display is paved with creativity, personal style, and a willingness to see the potential in everyday objects. By embracing one of these diy jewelry storage ideas, you are taking a powerful step toward transforming your daily routine from a frantic search into a moment of intentional selection and appreciation.
The true value of these projects lies in their adaptability. You are no longer limited by what's available in stores; you are the architect of your own organization system. The concepts we've covered are not just instructions but launchpads for your own ingenuity. They empower you to design a solution that perfectly matches your collection, your space, and your aesthetic.
Key Takeaways for Lasting Organization
To ensure your efforts create a lasting system, remember these core principles that weave through all successful diy jewelry storage ideas:
- Visibility is Vital: The most effective solutions keep your pieces in plain sight. Whether you choose the open display of a cork board or the clear compartments of an ice cube tray, seeing your options makes accessorizing faster and more enjoyable. You're more likely to wear what you can see.
- Customization is King: Don't be afraid to modify these ideas. Paint that vintage frame a bold color, add custom-sized foam inserts to your drawer dividers, or stain the repurposed ladder to match your bedroom furniture. The goal is a functional piece that feels like an extension of your personal decor.
- Protect Your Pieces: Beyond simple organization, think about preservation. A foam-lined drawer protects delicate metals from scratches, while a branched tree stand prevents necklaces from tangling. The right storage not only organizes but also extends the life and beauty of your cherished items.
Your Actionable Next Steps
Feeling inspired? The best way to begin is to take immediate, practical action. Start by assessing your collection. Separate items by type: earrings, rings, necklaces, and bracelets. This simple inventory will clarify which of these diy jewelry storage ideas will serve you best. Do you have a mountain of stud earrings? The cork board or ice cube tray might be your perfect match. Is your collection overflowing with long, delicate necklaces? The repurposed ladder or branch tree will prevent them from becoming a tangled mess.
Once you’ve identified the right project, gather your materials. Many of these solutions, like the decorative dish or vintage frame holder, can be created using items you already own. This isn't just about saving money; it's about creating a system that is uniquely and authentically yours. You are not just building a storage unit; you are crafting a personal gallery for the pieces that tell your story.
Now that you have the perfect plan to display your treasures, perhaps there's room for a new, sparkling addition. For stunning, high-quality pieces that deserve a special place in your new organizer, explore the curated collections at Precious Pulse Jewelry. From timeless designs to modern statement pieces, you'll find the perfect accessory to complement your beautifully organized collection.